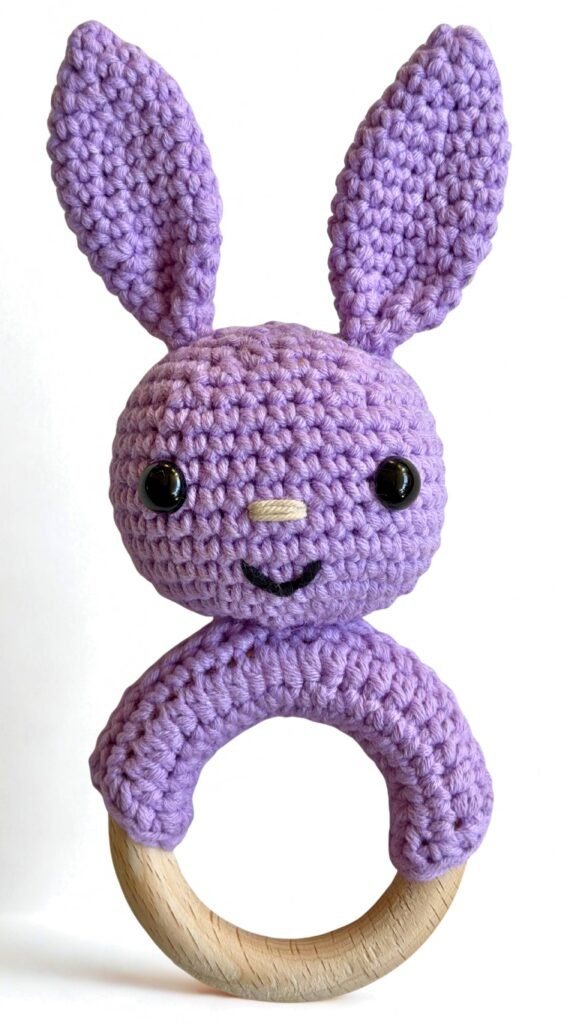
Today I’m really excited to share a project that has been on my mind for a while now. I was looking through my yarn baskets last week and realized I had the perfect shade of lavender cotton just sitting there, waiting for the right project. After playing around with a few ideas, this sweet little bunny rattle came to life, and I couldn’t be happier with how it turned out.
I’ve been crocheting for over ten years now—which honestly flies by when you love the craft as much as I do—and one of my absolute favorite things to make is baby toys. There is just something incredibly special about gifting a handmade heirloom to a new family.
If you are relatively new to crochet, please don’t feel intimidated by amigurumi. This pattern is actually a fantastic place to start. We are using very straightforward stitches, and the ring cover is just simple row-work. It’s a great project for practicing your tension without getting overwhelmed. Plus, adding the little rattle bead inside makes the whole process so rewarding.
So, find a comfortable spot, grab your 3.5mm hook, and let’s get started on the pattern!
Materials
- Wooden ring: Approx. 7 cm diameter
- Crochet hook: 3.5 mm
- Yarn: Lavender yarn suitable for a 3.5 mm hook, plus small amounts of beige (for the nose) and black (for the mouth)
- Safety eyes: 2 x 10 mm (or leftover black yarn to embroider the eyes)
- Rattle insert: 24 mm rattle bead
- Fiberfill (polyester stuffing)
- Tapestry needle
Abbreviations
- MR: Magic ring
- CH: Chain stitch
- SL ST: Slip stitch
- SC: Single crochet
- HDC: Half double crochet
- INC: Increase (2 single crochet stitches in the same stitch)
- DEC: Decrease (invisible single crochet decrease joining 2 stitches together)
- STS: Stitches
- RND(s): Round(s)
- R: Row(s)
- FO: Fasten off
- ( ) x… : Repeat the instructions within the parentheses the indicated number of times
Pattern Instructions
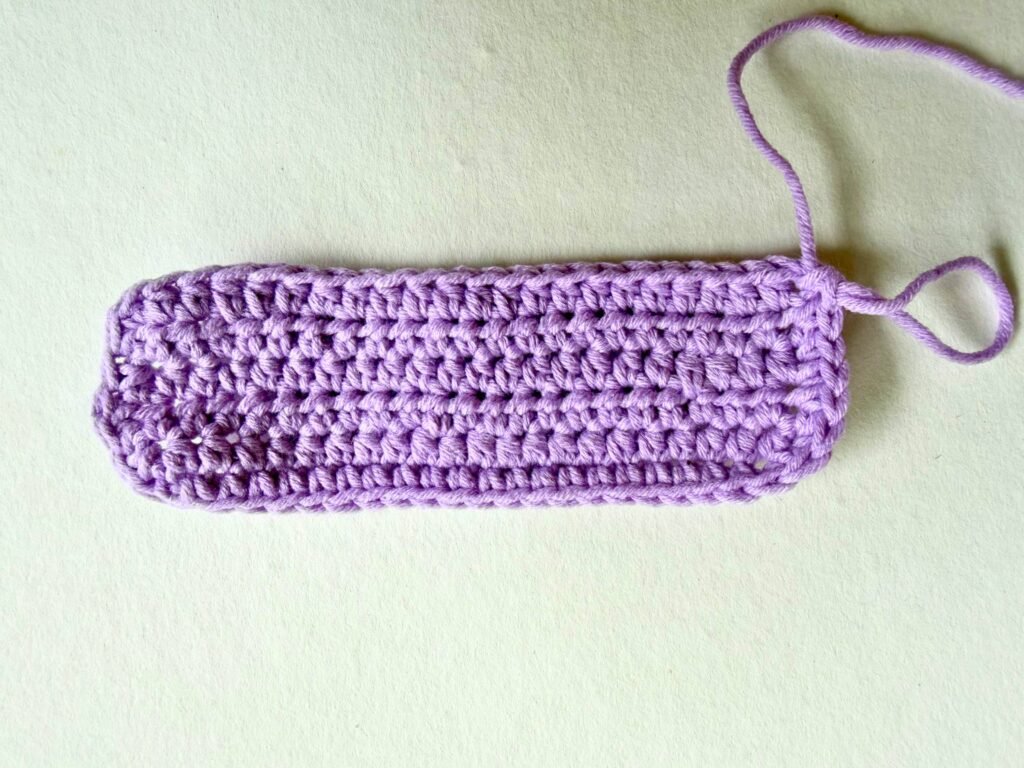
Body (Ring Cover)
Worked in rows.
- R1: Chain 24 {24}
- R2: HDC in 3rd chain from hook (the first 2 chains count as the first HDC), HDC in each chain across, turn. {22}
- R3: CH 2 (counts as first HDC), HDC in the second HDC of the previous row, HDC in each HDC across, turn. {22}
- R4: CH 2 (counts as first HDC), HDC in the second HDC of the previous row, HDC in each HDC across, turn. {22}
- R5: CH 2 (counts as first HDC), HDC in the second HDC of the previous row, HDC in each HDC across, do NOT turn. {22}
- R6: CH 2 (counts as first HDC), HDC in the second HDC of the previous row, HDC in each HDC across, do NOT turn. {22}
Border: Do not fasten off. Work a single crochet border around the entire rectangle to clean up the edges: work 6 SC along the short side, 20 SC along the long bottom edge, and 6 to 7 SC along the final short side.
Fit Check: Try wrapping the piece around your wooden teething ring. When folded, a maximum gap of 0.5 cm between the edges is allowed. If the gap is larger, repeat Row 4 one more time before adding the border.
Wrap the body piece tightly around the wooden ring and join the stitches of both long sides together using slip stitches. Pull the yarn tight while crocheting to ensure a snug fit. Fasten off and weave in the ends.

Head
Worked in continuous rounds. Stuff as you go.
- RND 1: 6 SC into a MR {6}
- RND 2: INC in each ST around {12}
- RND 3: (SC in next ST, INC) x 6 {18}
- RND 4: (SC in next 2 STS, INC) x 6 {24}
- RND 5: (SC in next 3 STS, INC) x 6 {30}
- RND 6: (SC in next 4 STS, INC) x 6 {36}
- RND 7–14 (8 rounds): SC in each ST around {36}
Placing the Eyes: Insert the 10 mm safety eyes between RND 11 and RND 12, leaving about 7 stitches of space between them.
Safety Tip: For extra security on baby toys, you can use a lighter to carefully melt the tip of the plastic post after the washer is pushed on, then flatten it with a metal spoon. This creates a “mushroom” shape that prevents the washer from slipping off. Alternatively, you can completely embroider the eyes with black yarn to eliminate any choking risk.
- RND 15: (SC in next 4 STS, DEC) x 6 {30}
- RND 16: (SC in next 3 STS, DEC) x 6 {24}
Start stuffing the head firmly with fiberfill. Insert the 24 mm rattle bead directly into the center of the head, ensuring there is plenty of stuffing entirely surrounding it so the head remains soft all the way around.
- RND 17: (SC in next 2 STS, DEC) x 6 {18}
- RND 18: (SC in next ST, DEC) x 6 {12}
- RND 19: (DEC) x 6 {6}
Finish stuffing firmly. Fasten off, weave the yarn tail through the front loops of the remaining 6 stitches to close the hole, and leave a long tail for sewing the head to the ring cover.
Face Details: Using your tapestry needle, embroider a small horizontal nose with the beige yarn centered between the eyes. Use the black yarn to embroider a happy, curved smile just below the nose.
Ears (Make 2)
Worked from the top of the ear downwards. Do not stuff.
- RND 1: 6 SC into a MR {6}
- RND 2: (SC in next ST, INC) x 3 {9}
- RND 3: SC in each ST around {9}
- RND 4: (SC in next 2 STS, INC) x 3 {12}
- RND 5: (SC in next 3 STS, INC) x 3 {15}
- RND 6–9 (4 rounds): SC in each ST around {15}
- RND 10: (SC in next 3 STS, DEC) x 3 {12}
- RND 11–12 (2 rounds): SC in each ST around {12}
- RND 13: (SC in next 2 STS, DEC) x 3 {9}
- RND 14: SC in each ST around {9}
Fasten off, leaving a long tail for sewing.
Assembly
- Shape the Ears: Fold the bottom opening of each ear flat in half, and sew the edges together. Then, fold that flat edge slightly in half again to give the ear its distinct pinced/cupped look before attaching.
- Attach Ears to Head: Position the ears on top of the head (around RNDs 2-4) and sew them down securely.
- Attach Head to Ring: Position the completed head centered onto the crochet ring cover. Sew it down very securely, going through both the head stitches and the ring cover stitches several times to ensure it can withstand pulling. Weave in all remaining ends securely.
And that is all there is to it! Your finished bunny rattle is ready to go. I think the lavender gives it such a classic, calming look, but it would look equally beautiful in a soft mint, cream, or soft grey if you’re making a few of them.
I really hope this project inspires you to keep creating. If you are a beginner and your ears ended up slightly asymmetrical or the sewing felt a bit clumsy, please don’t be discouraged. Honestly, even after a decade of doing this, my pieces still don’t always turn out completely flawless on the first try. Those slight variations are exactly what give handmade toys their charm and character anyway.
If you decide to make one, I would absolutely love to see it. Feel free to share your photos with me, seeing your finished projects always makes my day. Instagram: Tag me @ydascrochetcorner.
Until next time and happy crocheting!
Copyright
This pattern is for personal use only. The design, photos, and written instructions are the intellectual property of YdasCrochetCorner. Sharing & Distribution: You may not copy, redistribute, or sell this pattern (or any part of it) in any form. Instead, feel free to share the link to my blog! You are welcome to sell physical items made from this pattern! If you sell them online, please provide a link to my shop or credit me as the designer (e.g., “Pattern by [YdasCrochetCorner]”).