The Essential No-Gap Base for Bags, Pillows, and More!
Every crocheter needs a “workhorse” pattern in their repertoire—a square that is reliable, thick, and, most importantly, hole-free. While traditional granny squares are famous for their breezy, lace-like clusters, they aren’t always the best choice for functional items. If you’ve ever used a crochet tote bag only to have your favorite pen or lip balm slip through a gap in the stitches, you know exactly what I mean!
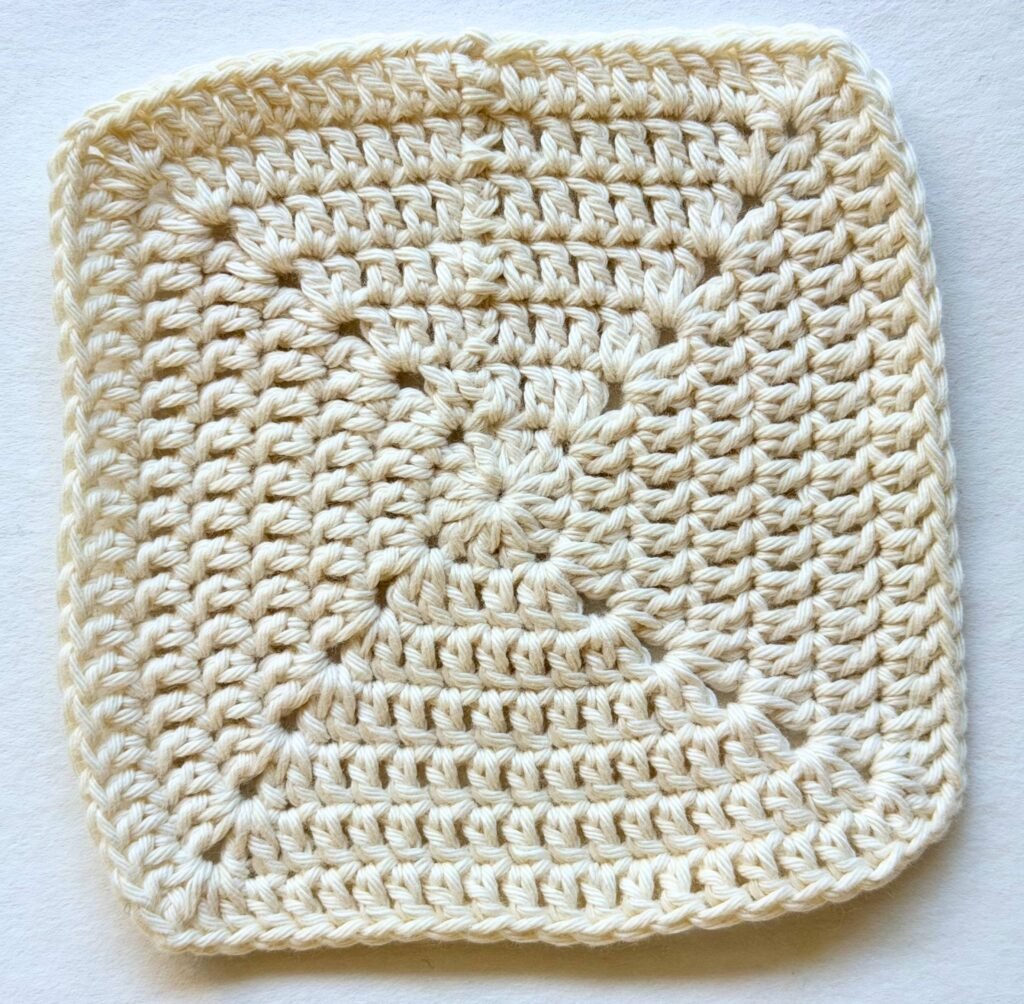
Today’s pattern is the solution. I’m sharing my favorite Solid Granny Square design. It’s a dense, fabric-like square that provides incredible structure for bags and home decor. By using a clever “minimal-space” corner technique, we’ve eliminated the large windows of a classic square, giving you a smooth, professional surface that’s perfect for joining.
Why This Square is a Game-Changer:
- No need to line your bags with fabric! This solid wall of stitches keeps everything inside exactly where it belongs.
- The lack of gaps means the yarn can’t stretch out as easily, so your bag will keep its shape.
- These squares look modern and clean on their own, but they also act as the perfect “anchor” when paired with other squares.
Project Overview
- Skill Level: Absolute Beginner
- Style: Solid, Dense, and Modern
- Best For: Tote bags, crossbody purses, and cozy, heavy blankets.
Materials
- Hook: 3.0mm Crochet Hook or any size, if you want to make it bigger or smaller. (If you tend to crochet loosely, drop down to a smaller hook to keep the squares extra solid!).
- Measuring Tape: To ensure all your squares are coming out the same size before you join them.
- Stitch Markers: Very helpful for marking your corner spaces so you don’t accidentally skip a stitch on the long, solid sides.
- Yarn Needle: A large-eye blunt needle for weaving in ends and sewing your squares together.
- Scissors
The Pattern
This pattern uses only Double Crochets (DC) to create a sturdy, fabric-like finish.
Round 1: Make a magic ring. Chain 3 (counts as 1 DC). Work 11 DC into the ring. Join with a slip stitch to the top of the Ch-3. (12 DC total)
Round 2: Ch 3 (does not count as 1 DC).
- In the same stitch, work [1 DC, Ch 2, 2 DC] — This is your first corner.
- *DC in the next 2 stitches.
- Corner: [2 DC, Ch 2, 2 DC] in the next stitch.
- Repeat from * around. Join with a slip stitch.
Round 3: Ch 3. DC in each stitch until you reach the corner space.
- In the Corner Space: [2 DC, Ch 1, 2 DC].
- Note: Using a Ch-1 instead of a Ch-2 makes the corner hole almost invisible!
- DC in every stitch along the side.
- Repeat around. Join with a slip stitch.
Round 4 & Beyond: * Simply repeat Round 3! As the square grows, you just continue to DC in every stitch and place [2 DC, Ch 1, 2 DC] in every corner.
Feel free to continue making your square as big as you like and block the square for a neater finish.
Copyright
This pattern is for personal use only. The design, photos, and written instructions are the intellectual property of YdasCrochetCorner. Sharing & Distribution: You may not copy, redistribute, or sell this pattern (or any part of it) in any form. Instead, feel free to share the link to my blog! You are welcome to sell physical items made from this pattern! If you sell them online, please provide a link to my shop or credit me as the designer (e.g., “Pattern by [YdasCrochetCorner]”).